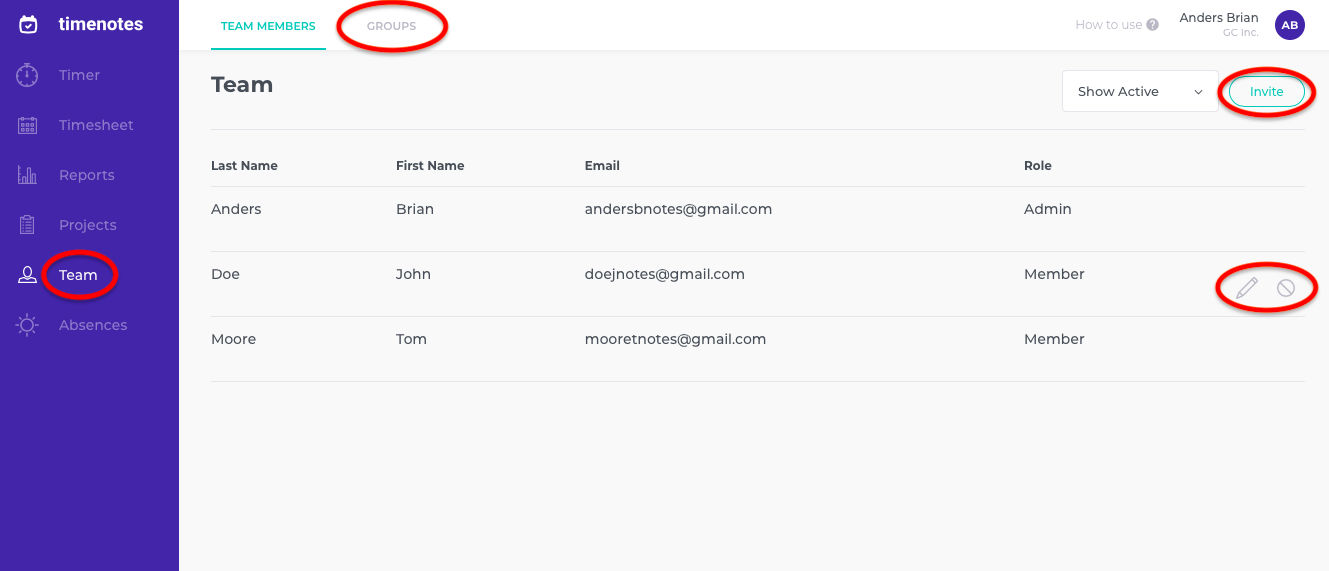
Manage workspace users by accessing the "Team" section on the sidebar. Invite team members, by clicking the "Invite" button in the top right of the screen. Type in the email of the person you want to invite to the workspace.

Click the "Edit" icon on the far right of the user, to begin the editing process. To begin user details other than your own, you must be an admin. Set up default billable and default cost rates for a member to track your spending during projects. Change the role of the user to an admin or a member. Configure absence allowance on holidays and remote days to better suit your members' needs.
Disable users by clicking the "Disable" icon on the far right of the user tab. To do this, you must also be an admin. At this point you can still bring back the deactived user. To do this, go the "Inactive users" category and click "Restore". If you want to delete the user instead, click "Delete". All member data will be lost and the action will not be undone.
Create groups to structure your organisation. Creating groups also means using Timenotes with greater ease. If you want to assign members to a project, you will not have to add each member separately. If they're in a group, you can add them all in one click.
Guides - What is cost and billable rate
Guides - How to configure who can create and manage projects