Overview
The goal of the Timenotes timesheet approval feature is to enhance timesheet accuracy by providing teams with a streamlined workflow for maintaining clear timesheet statuses throughout the designated time period set by your organization.
This feature is based on time periods, configured as monthly by default, in which your company operates. During these periods, users are required to submit their timesheets for admin approval. Timenotes offers a straightforward way to understand your team's timesheet status, allowing team members to confirm that their processes are complete and ready for admin review and finalization.
With this feature, you’ll no longer need to wonder if Mark, who missed logging two hours last Friday, actually worked less due to internal issues communicated elsewhere, or if he simply forgot to log the time. This clarity prevents potential delays in salary payments or client invoicing.
Timenotes approvals provide full confidence that the process is complete, enabling you to invoice clients, pay salaries, or close the topic for a given period seamlessly.
How to Enable Approvals and Configure Periods
By default, the approval period type is set to monthly. If your company operates on shorter periods, admins can change this in the workspace settings page - Workspace Settings.
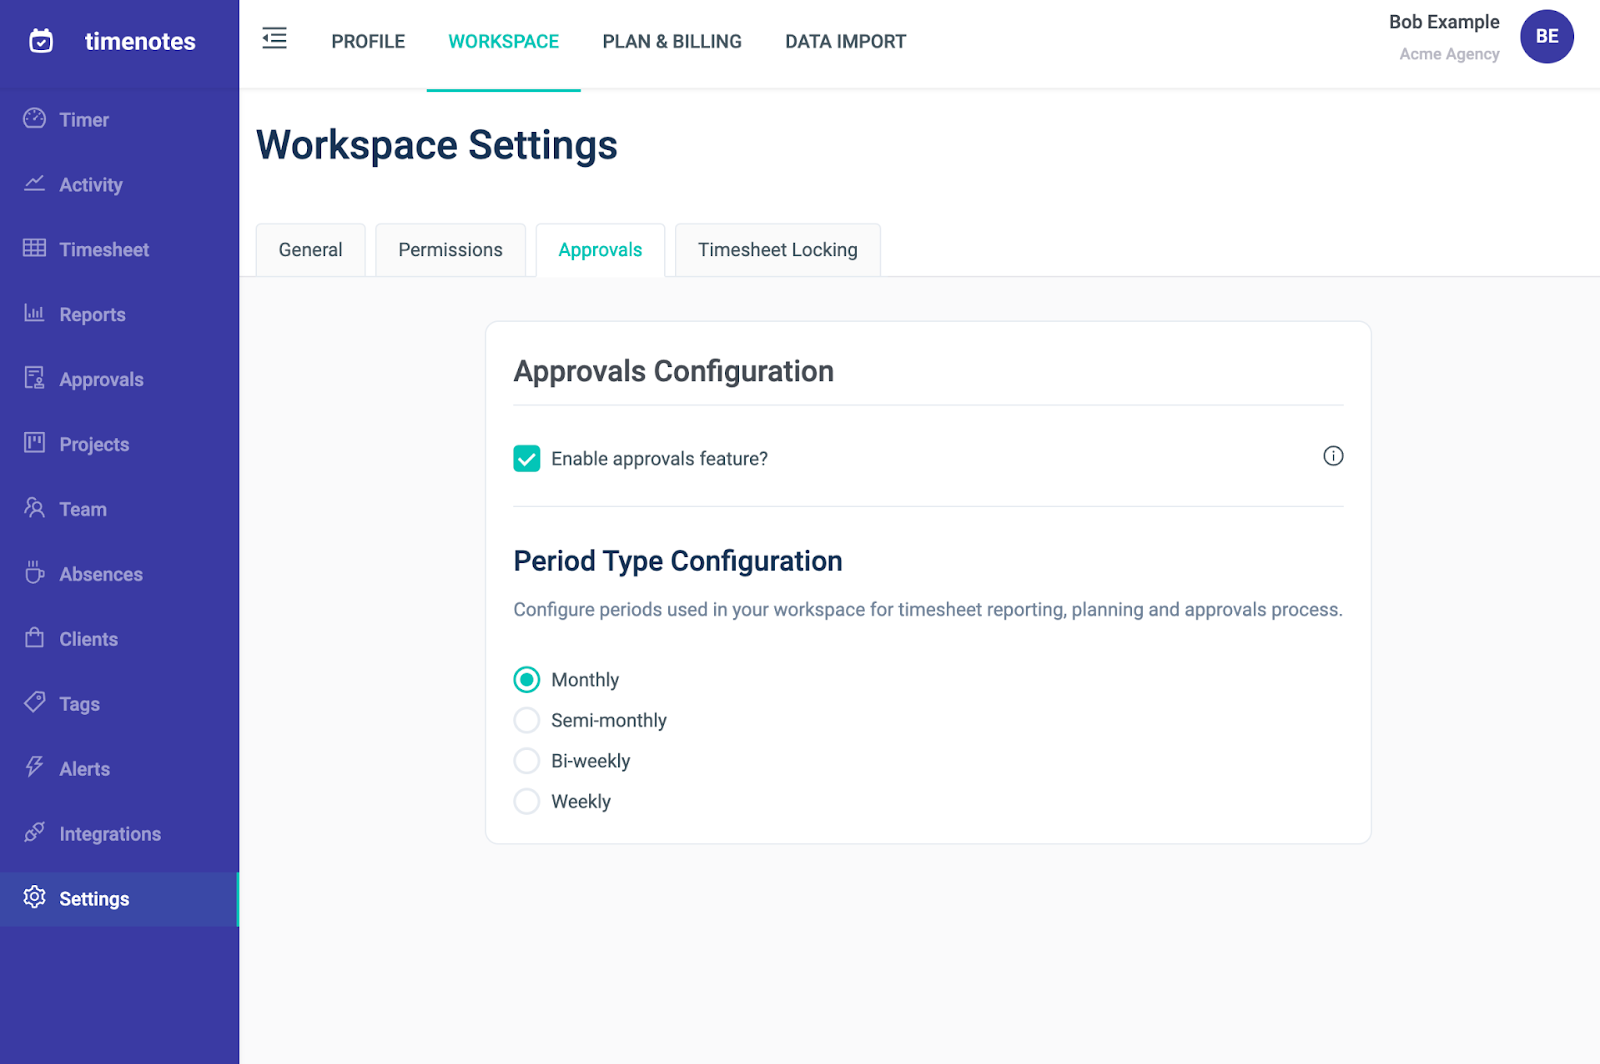
If your company does not need this feature and prefers to manage timesheet status differently, you can disable it from this view. Disabling the feature will remove it from the sidebar for all workspace users. Of course, it can be re-enabled anytime in the future.
Periods Approval Overview
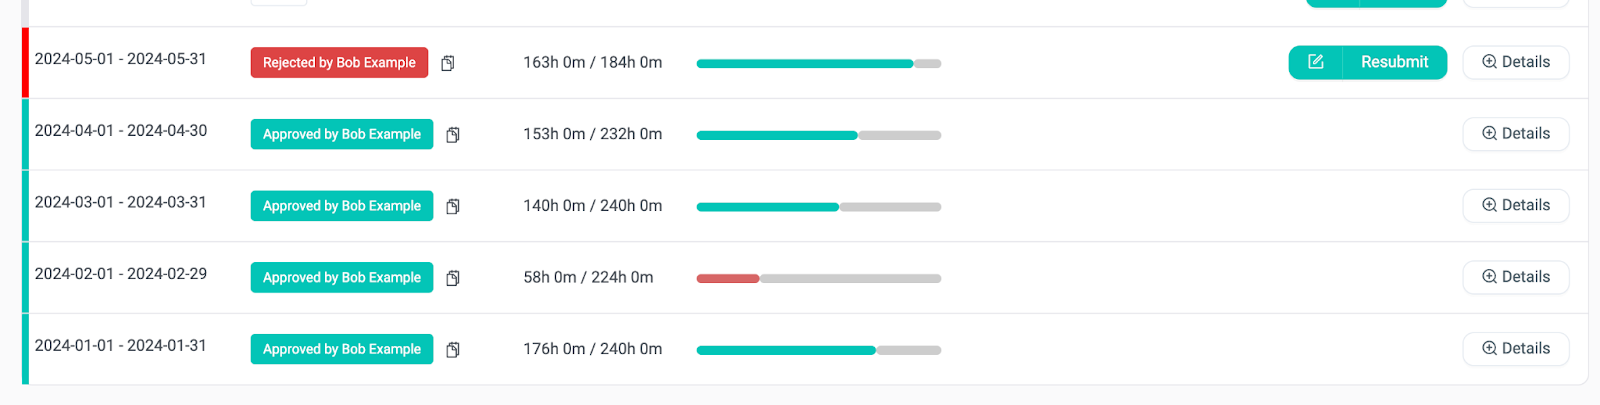
As a workspace admin, the approvals period view gives you an overview of timesheet statuses per period throughout the year. This view helps you manage timesheet locking and ensures all time is submitted correctly, approved by admins, and ready for use in reporting, client invoicing, or any other business activities that rely on accurate timesheet data.
For instance, you can see that timesheets for January to April are approved and locked, even for admins. If corrections are needed, an admin can unlock the timesheet, ensuring no accidental changes are made to approved time entries, thereby protecting historical data integrity.
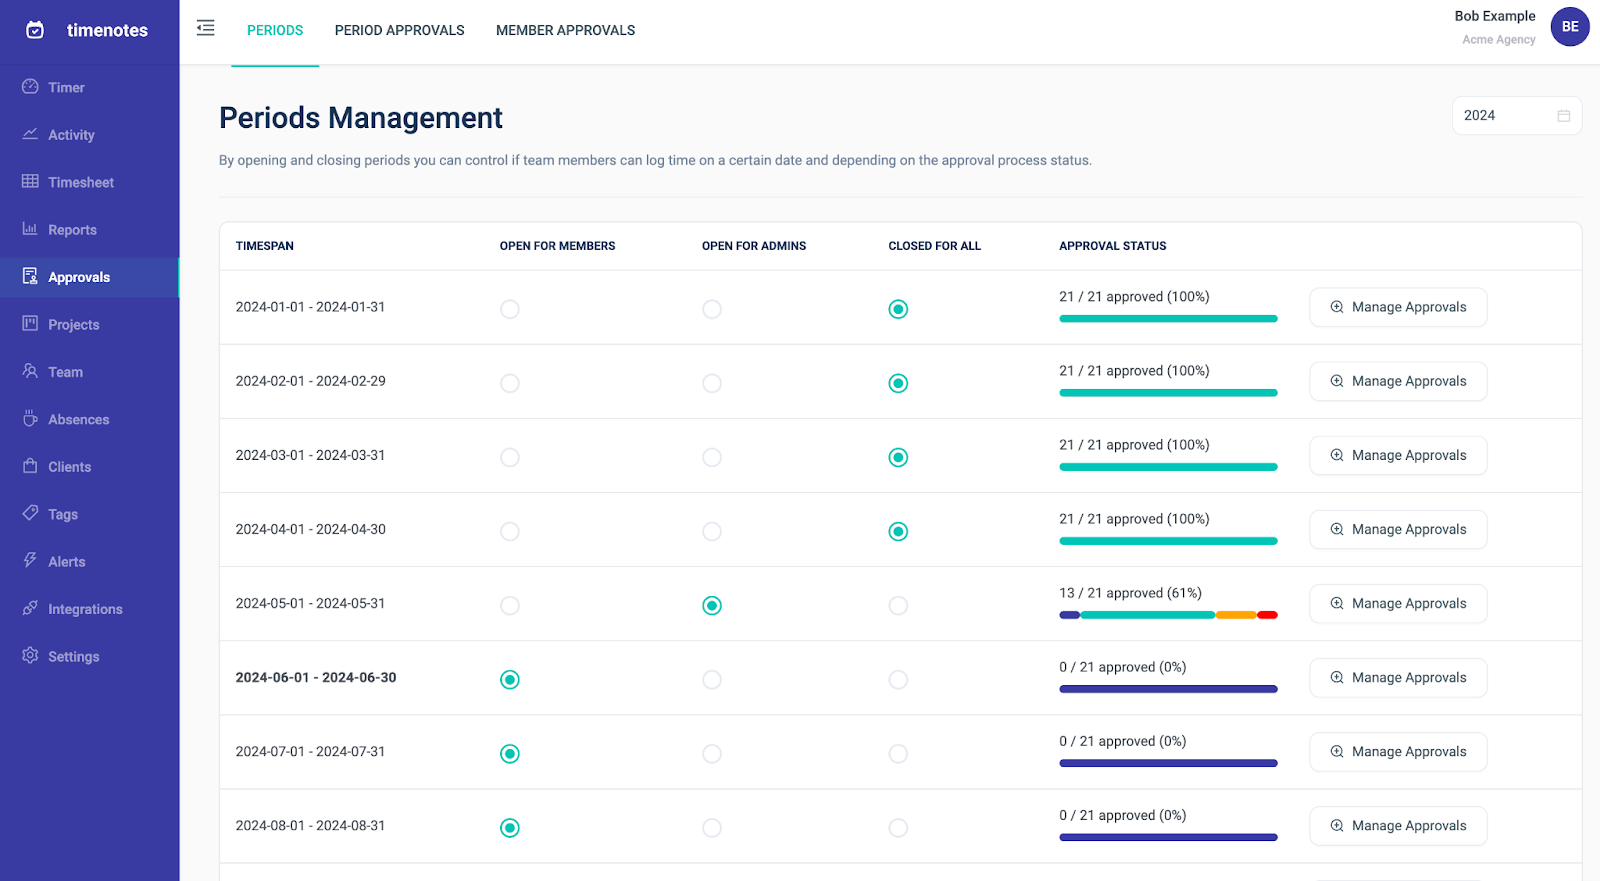
In the current month (e.g., May), you might see that the timesheet is open only for admins in case corrections are needed but closed for team members.
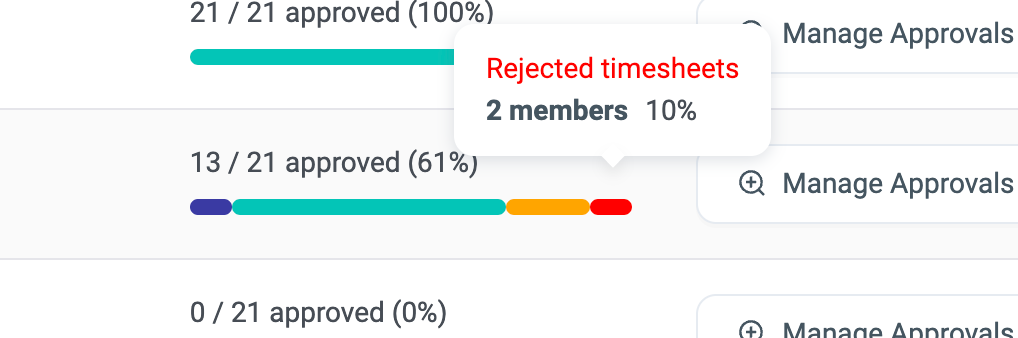
You can also see a clear distribution of approval statuses by hovering over the chart in the status column.
To understand the details, click "Manage approvals" to get a comprehensive view of the exact status for a given month or other approval periods.
Period Approval
The period approval view provides admins with a clear overview of the approval status for a given month. It shows the timesheet status per team member, grouped by respective approval statuses:
- Waiting for approval
- Rejected
- Waiting for submission
- Approved
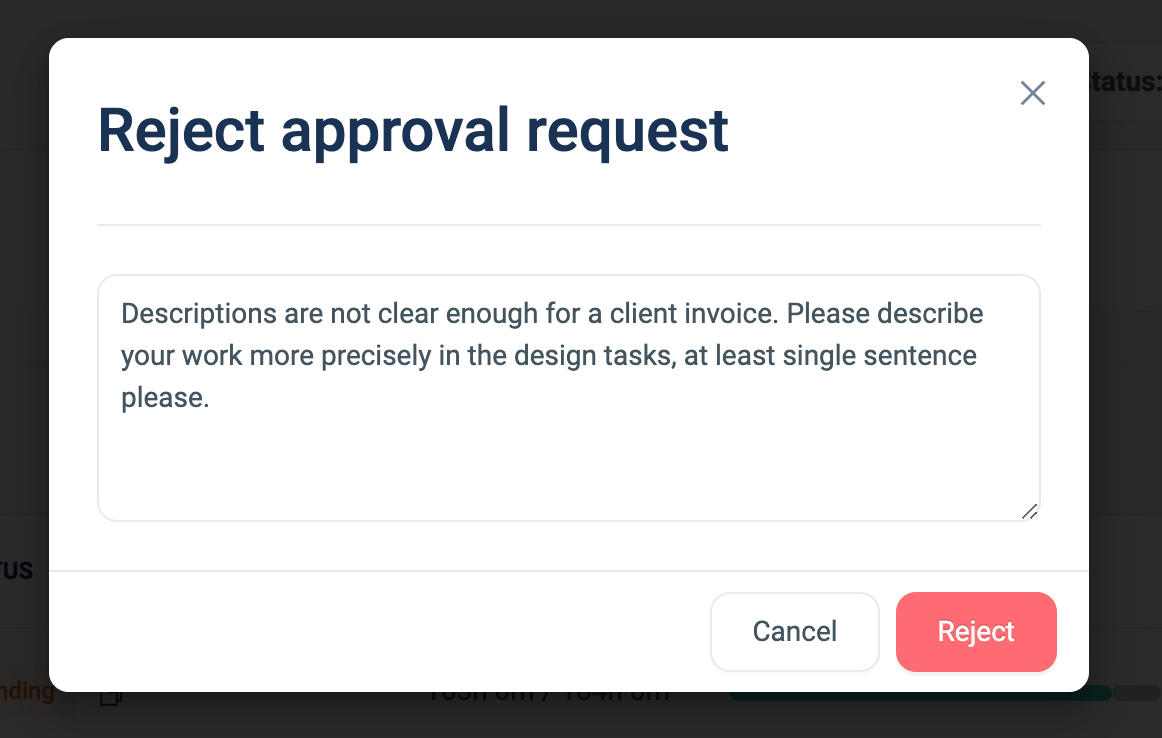
Admins can filter timesheets and decide whether to approve or reject the submitted timesheets.
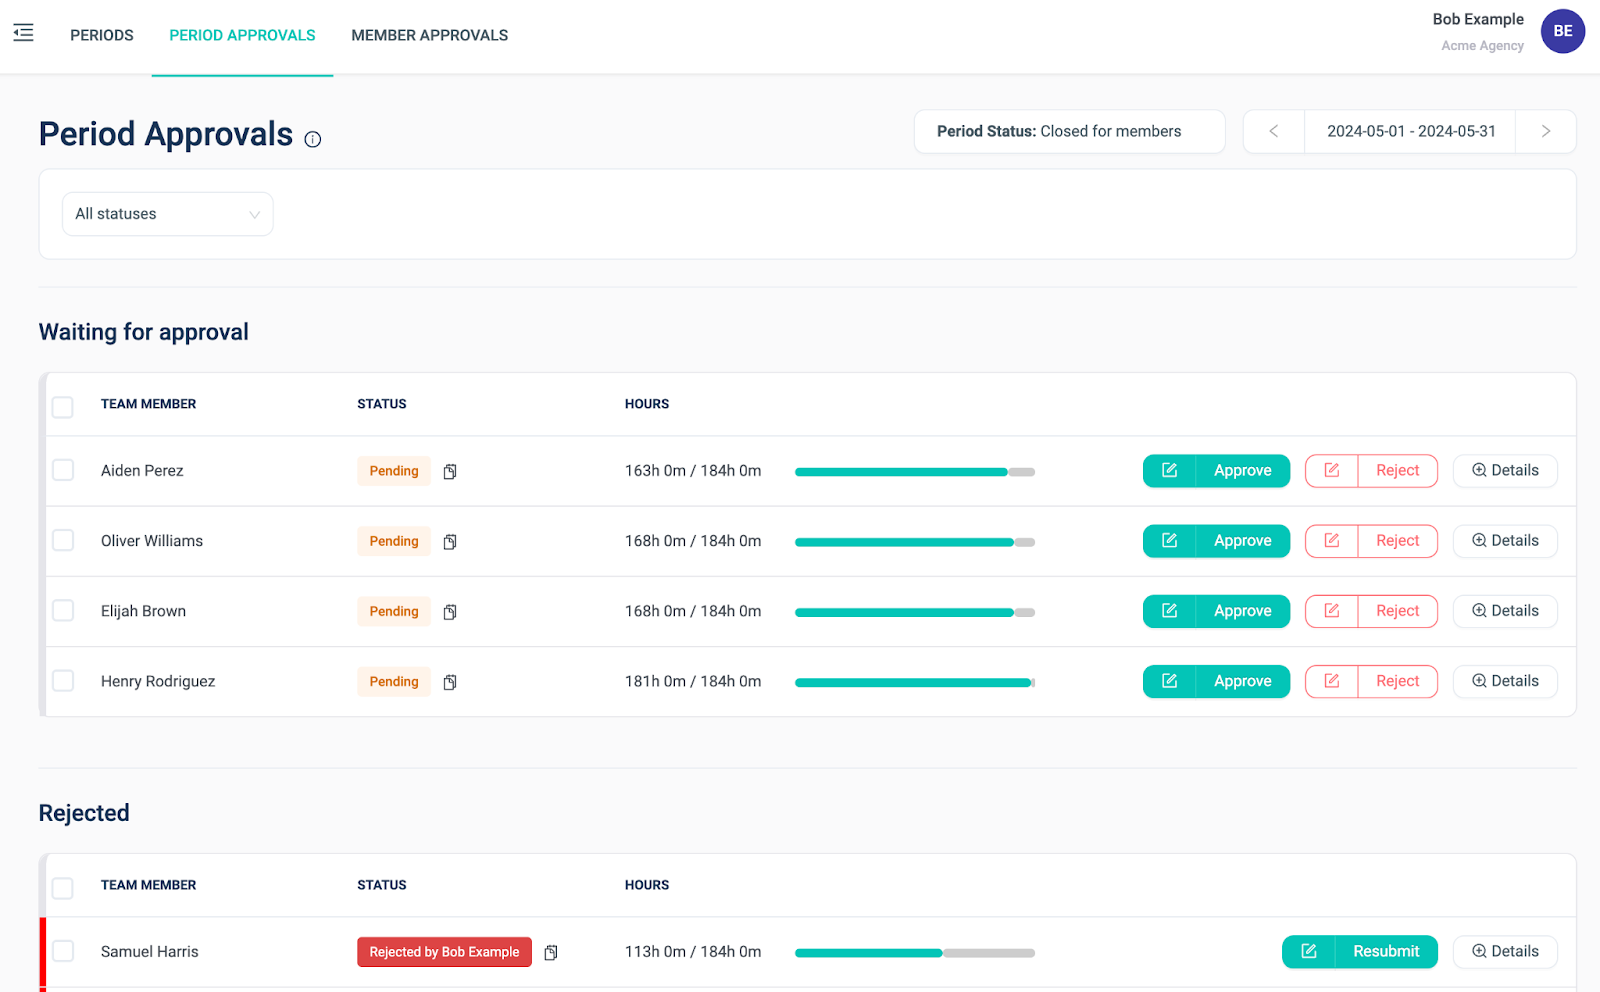
There is also an option to attach a note to a decision, allowing clear communication to team members about what is missing in a timesheet and what corrections are expected.
Team members will receive email notifications about changes in their approval status, enabling them to take appropriate action. If a workspace admin is not responsible for timesheet approvals, they can disable notifications on their profile page - Profile Settings.
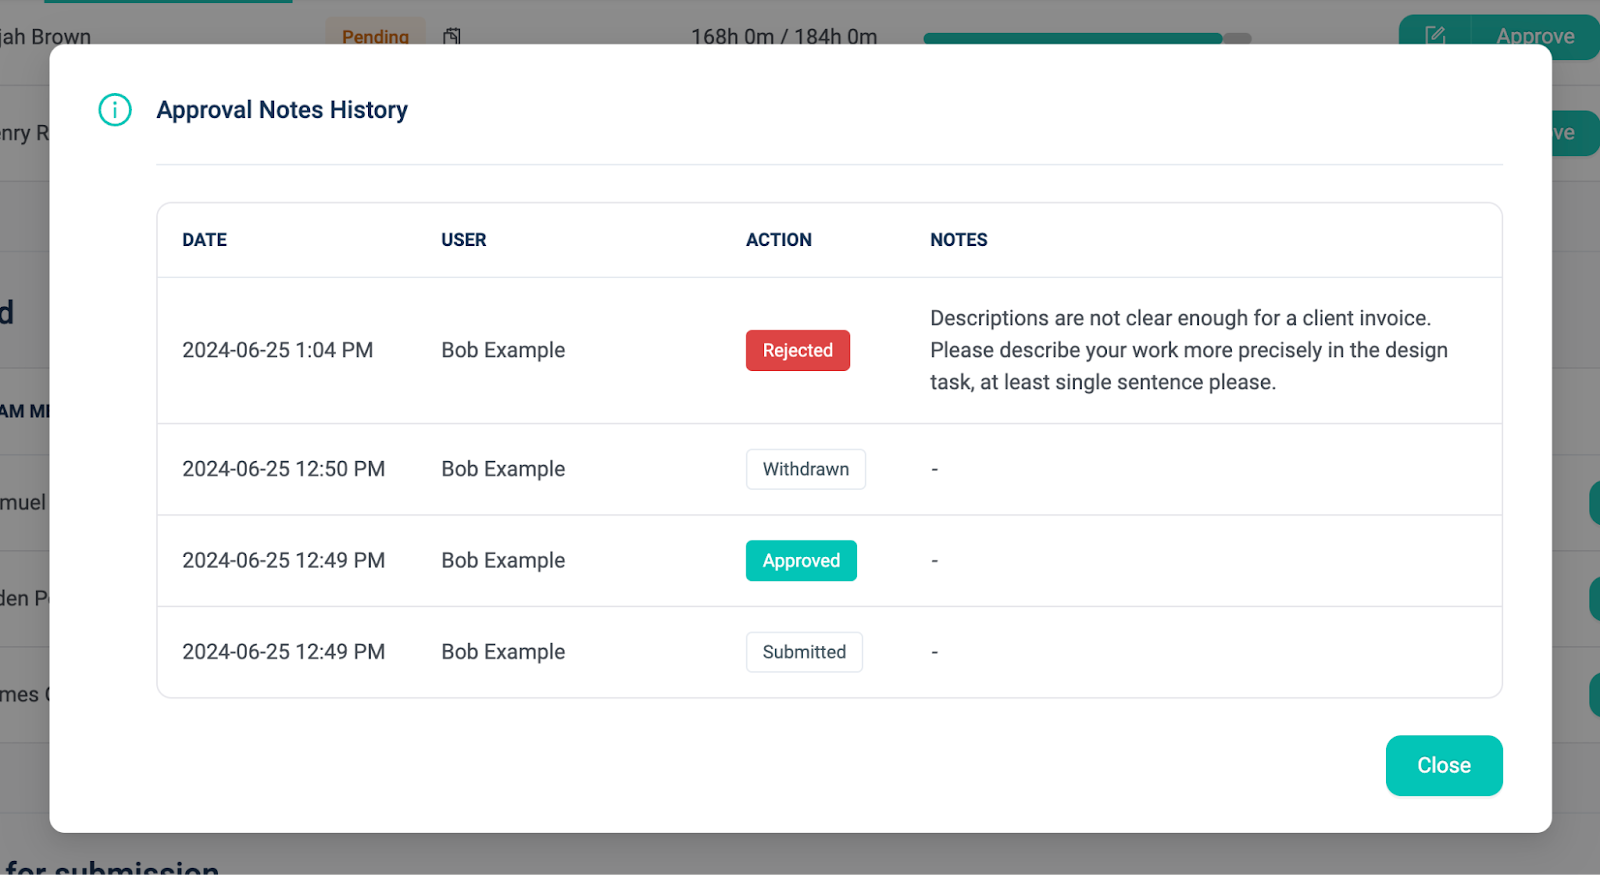
Approval Audit Log
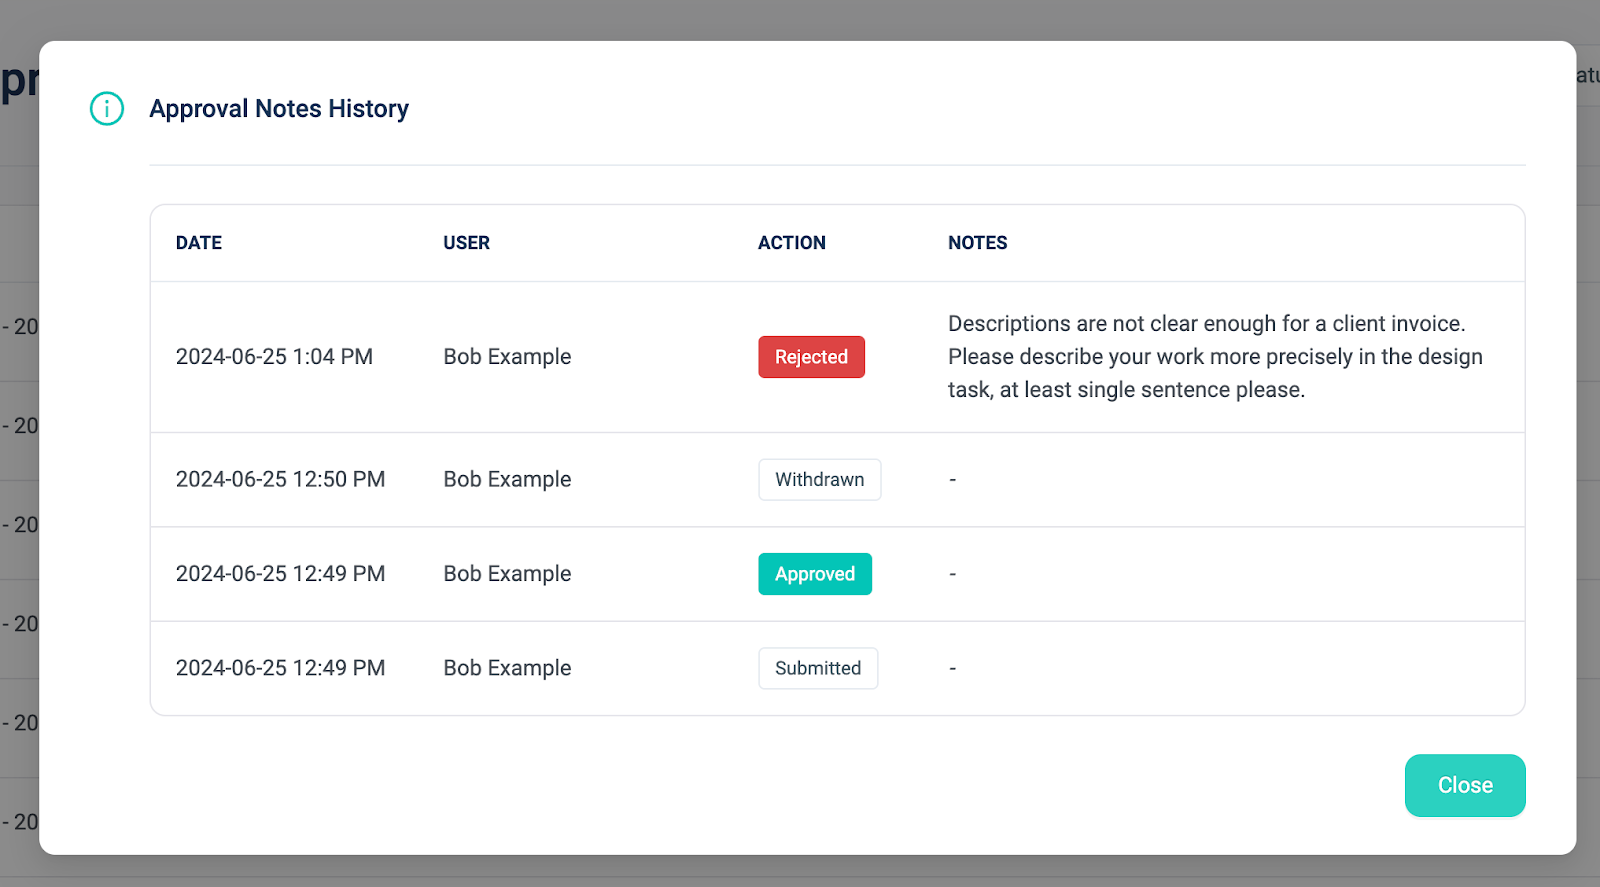
In addition to email notifications, all actions and their respective dates will be stored as an action log for each active approval submission. This log can be accessed later under the notes icon, providing a historical record of who approved or rejected the timesheet and the reasoning behind the decision.

Individual Timesheet Review and Approval
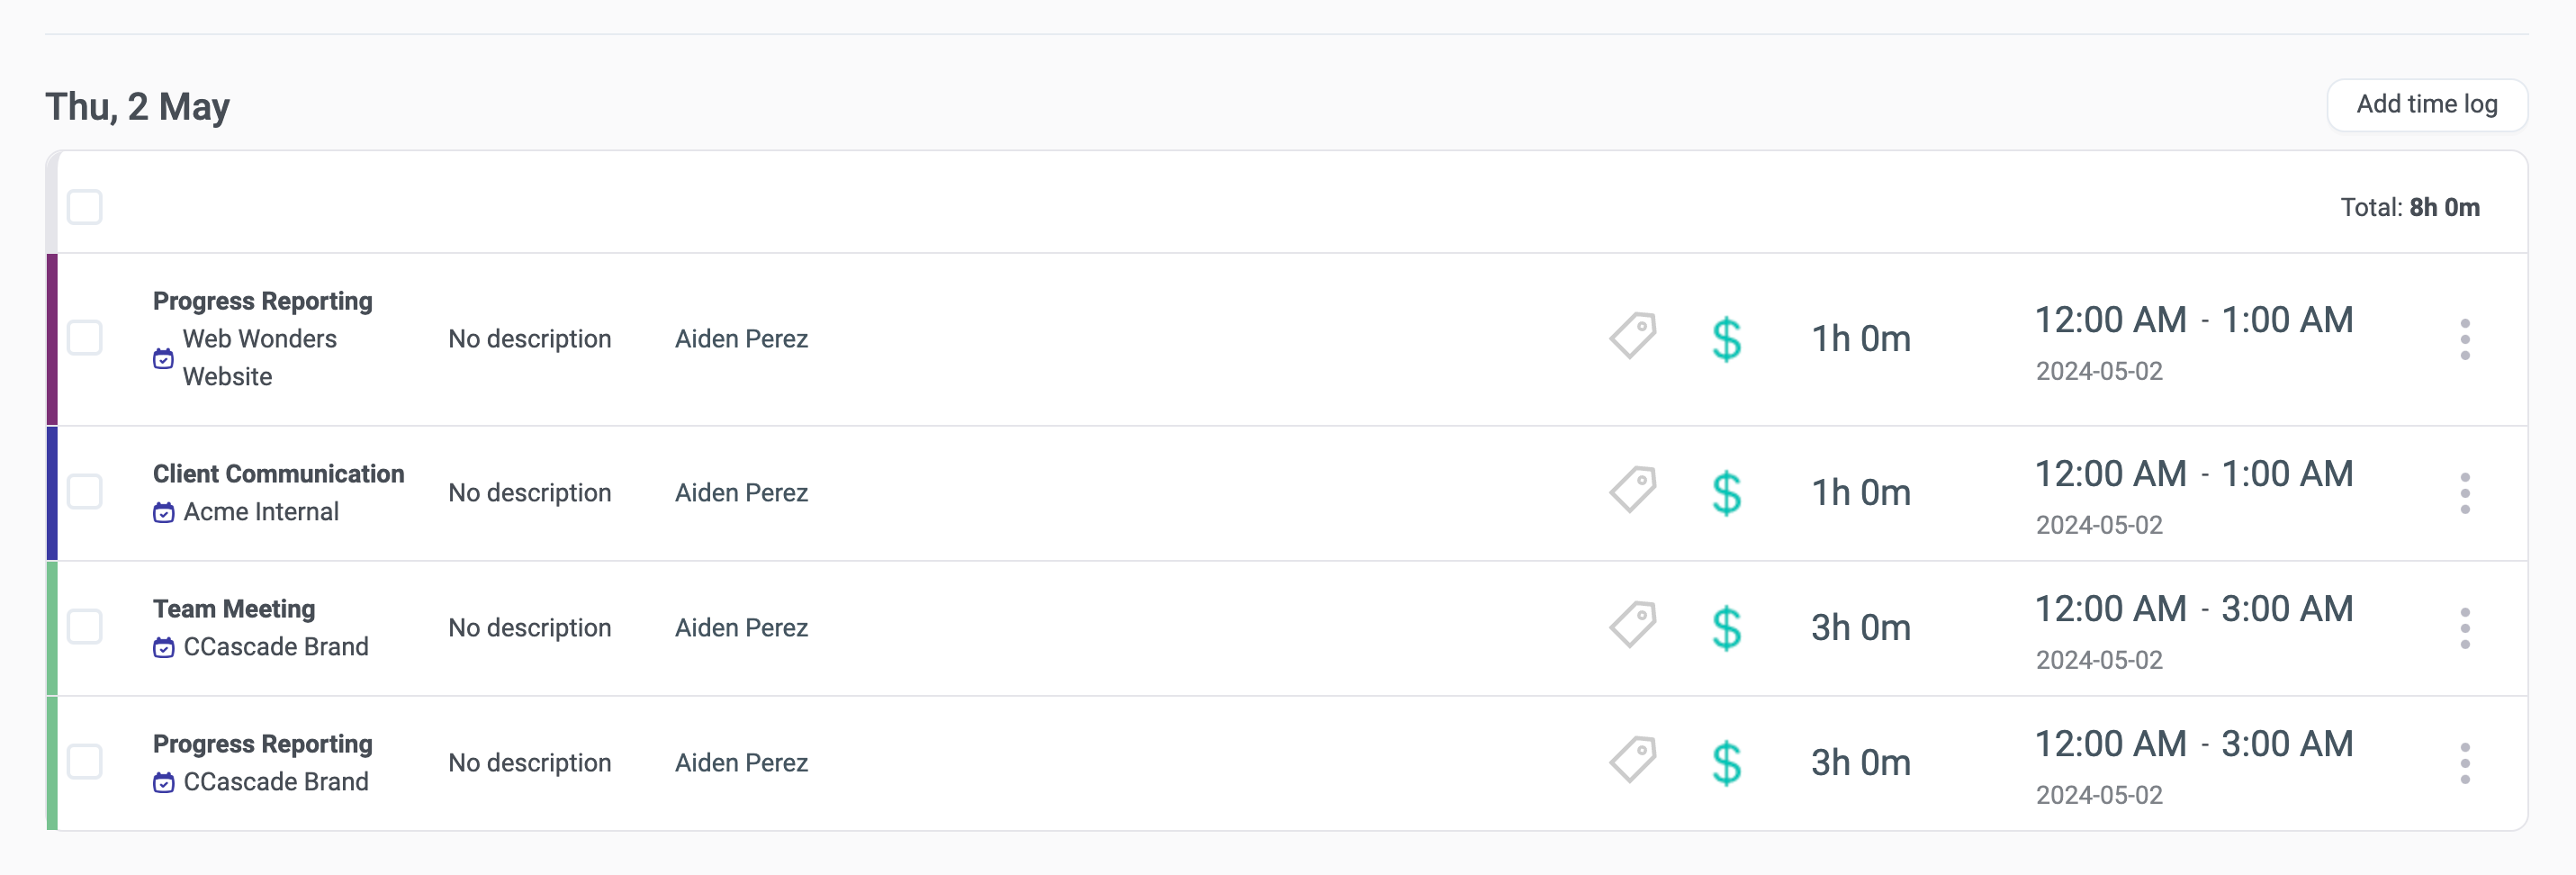
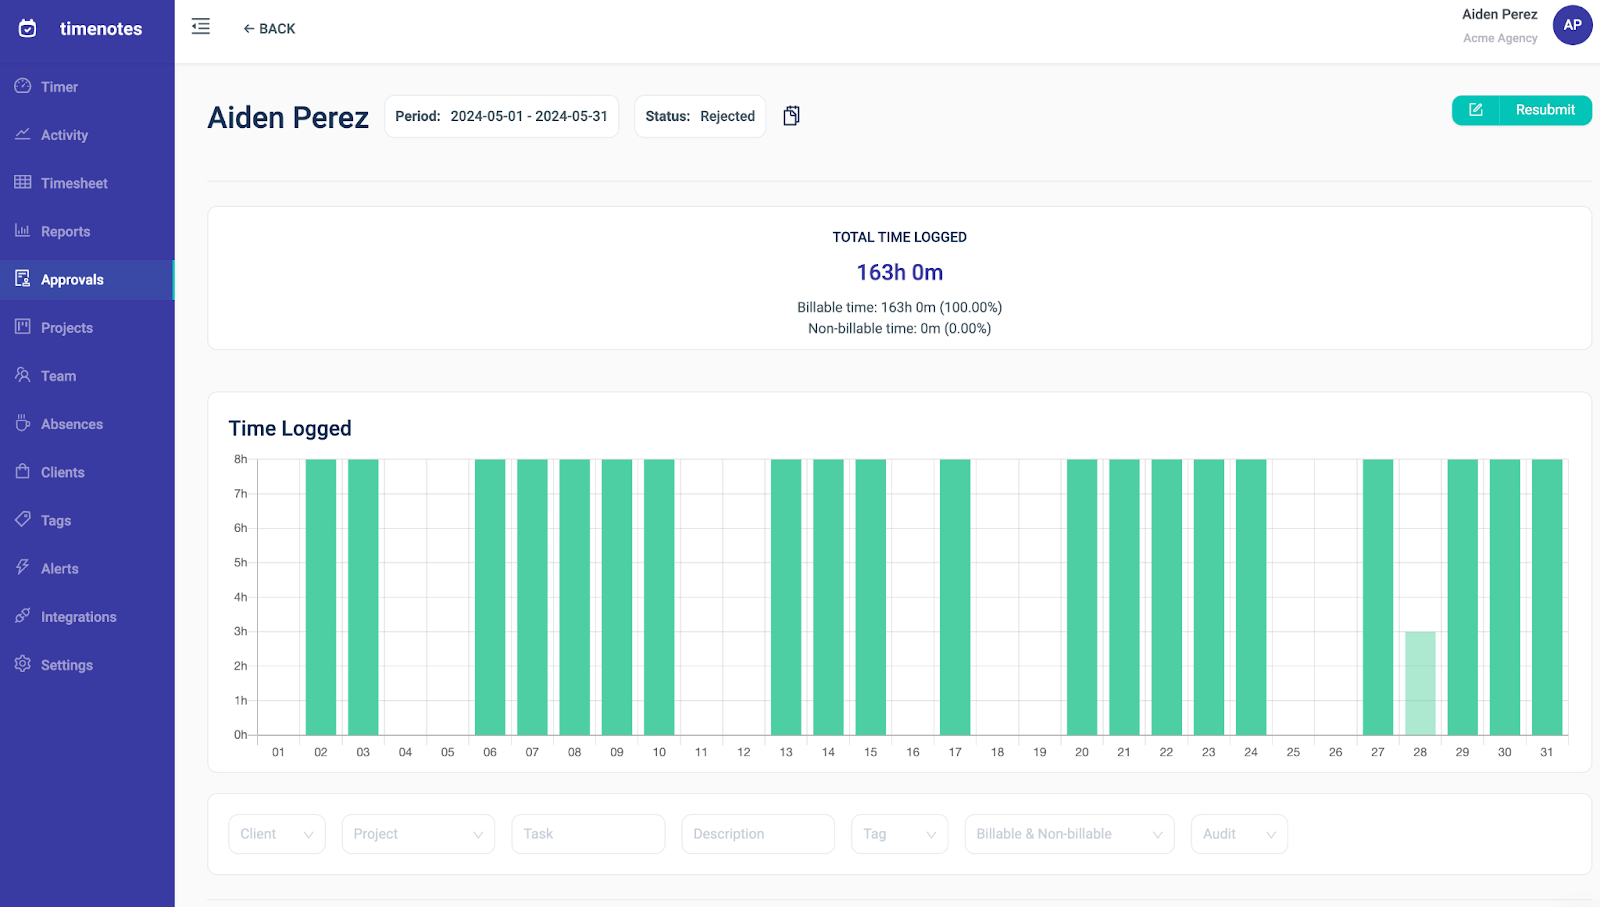
To review an exact timesheet submitted for approval, an admin can click the "Details" button on the period overview table. This view allows the admin to review the summary of time logged in the submitted period with action buttons to make decisions.
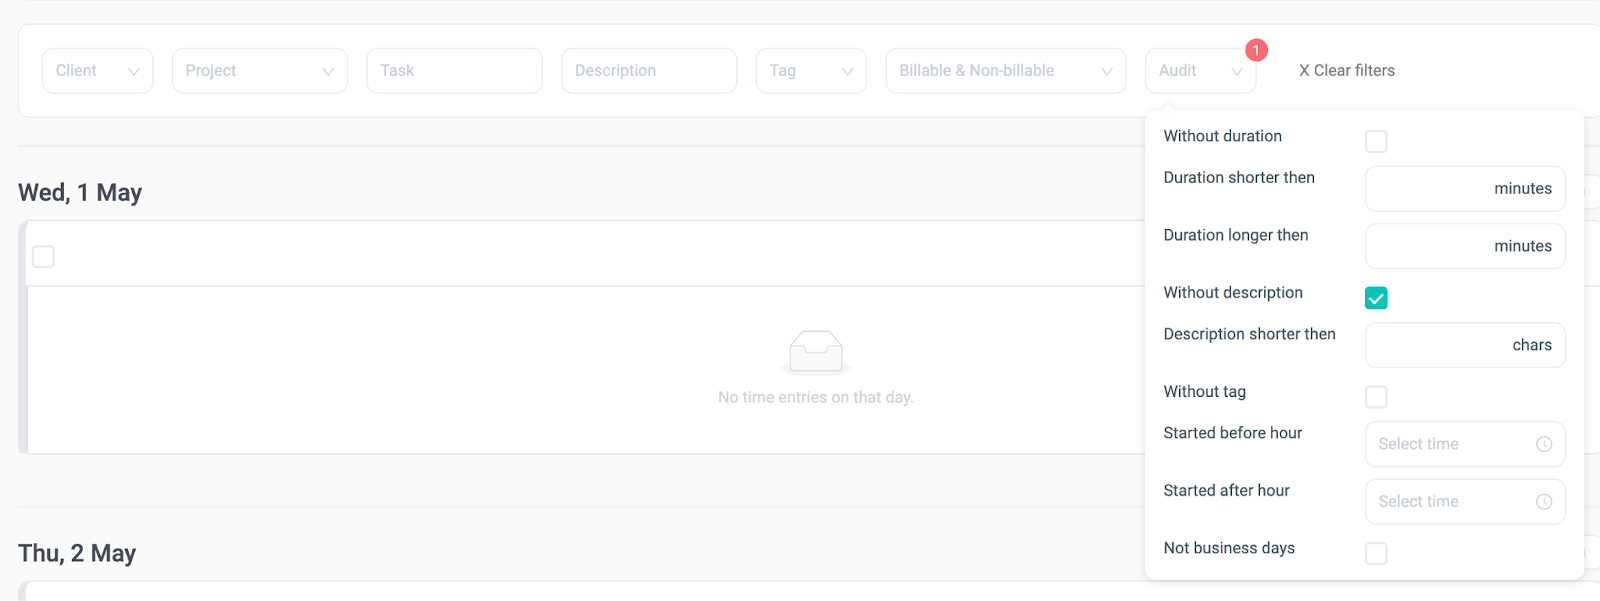
The view displays all the days from a submitted period in a time logging table, enabling admins to clearly review, correct, or add missing time entries. It also offers filtering options for time entries, making it easy to identify what needs to be checked or fixed.
Timesheet Locking
The approvals feature modifies how timesheets are locked for team members. Admins can lock the entire period for members and/or themselves. Dates for a given period per team member will be automatically locked once their timesheet is submitted for approval or approved. This ensures that the approved timesheet will not be modified and confirms that the user has finalized their time tracking.
If corrections are needed, admins can withdraw approval at any time to allow for necessary adjustments.
How to Submit a Timesheet for Approval
If your organization uses Timenotes approval to control timesheet status, you might be required to submit your timesheet for approval.
Approvals in Timenotes occur per the period configured by your workspace administrator, set as a monthly period by default. As a standard workspace member, you can view your timesheet periods and their statuses under the Approvals tab in the sidebar - Approvals.
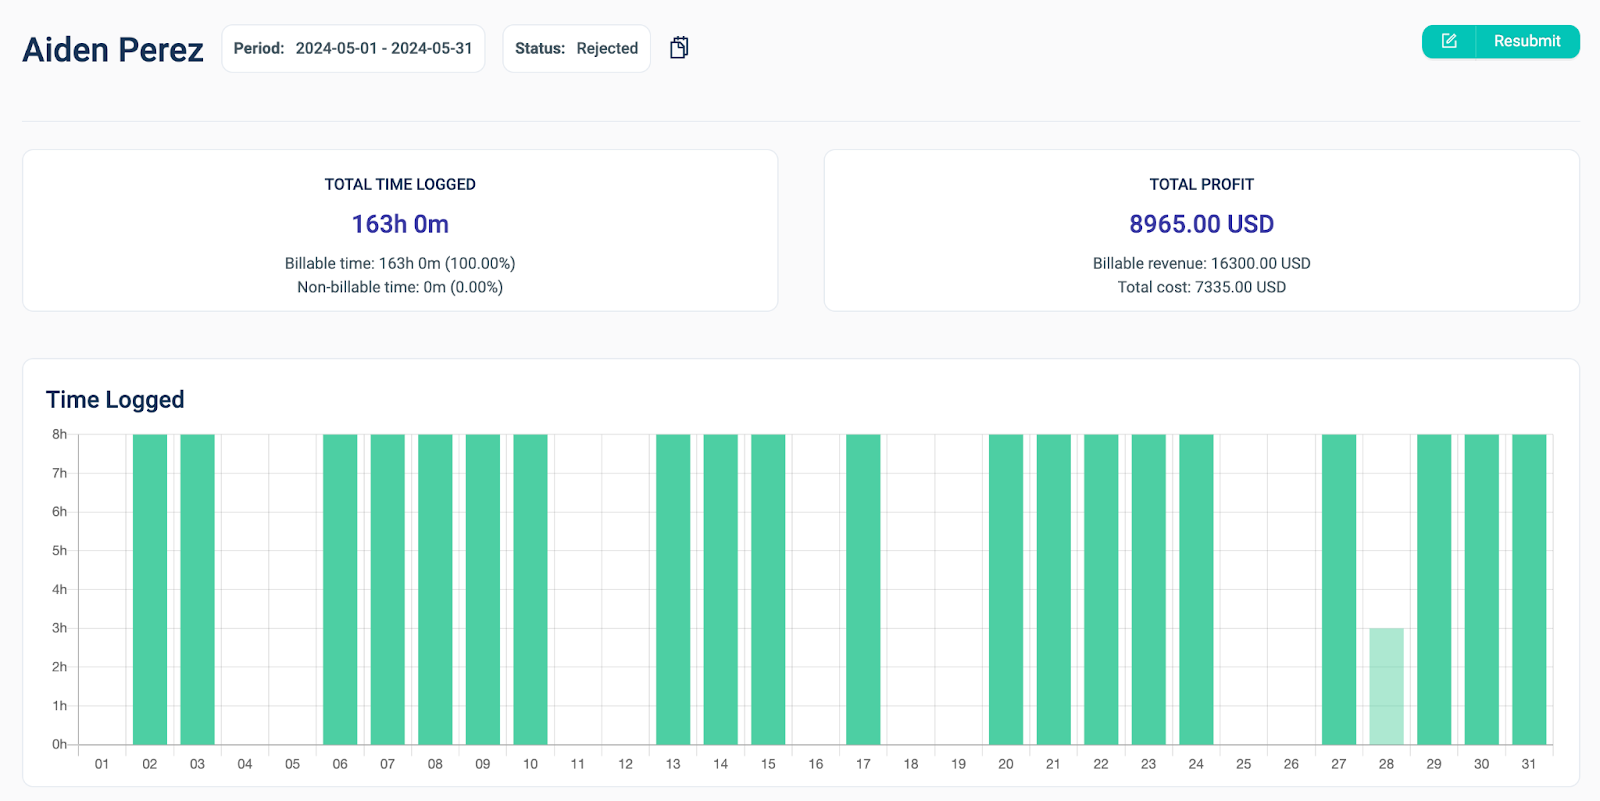
From this view, you can see the exact status of your timesheet approval. If more details are needed, click the notes icon next to the timesheet to learn the reason behind a rejection if the admin has left a note.
You can directly click the submit button on this view to submit a timesheet for approval or click the details button to review the timesheet again or make corrections on a custom approval period time table view. This allows you to filter time entries by dates in a period and make any necessary corrections before submission.
Keep in mind that once your timesheet is submitted for approval or approved, it will be automatically locked, and no modifications will be possible. If you need to correct a submitted timesheet, you can cancel the submission and make the corrections again. For corrections on an approved timesheet, contact your administrator to withdraw the approval.
When submitting, you can add an extra note with clarification by clicking the pen icon on the submit button.
By following this guide, you can ensure smooth and accurate timesheet management, enhancing your team's productivity and operational efficiency.