The importing process in Timenotes
Importing data into Timenotes is a swift, customisable process - described below. Remember, that you can import data (also user data) without notifying team members.
Step by step importing time logs
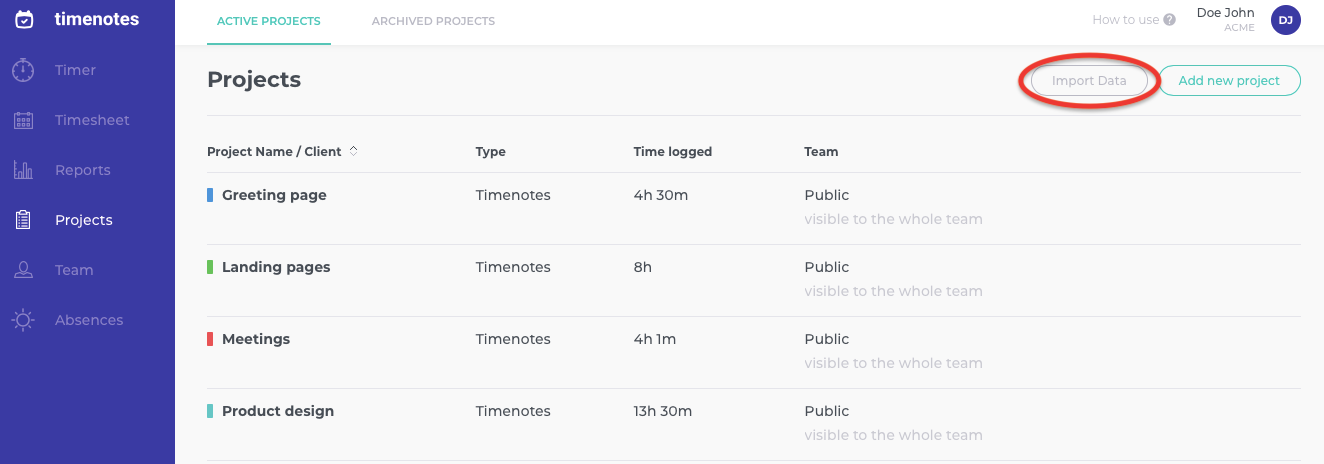
Getting the import process started - Go into "Projects" on the sidebar and click "Import data" in the top right corner.

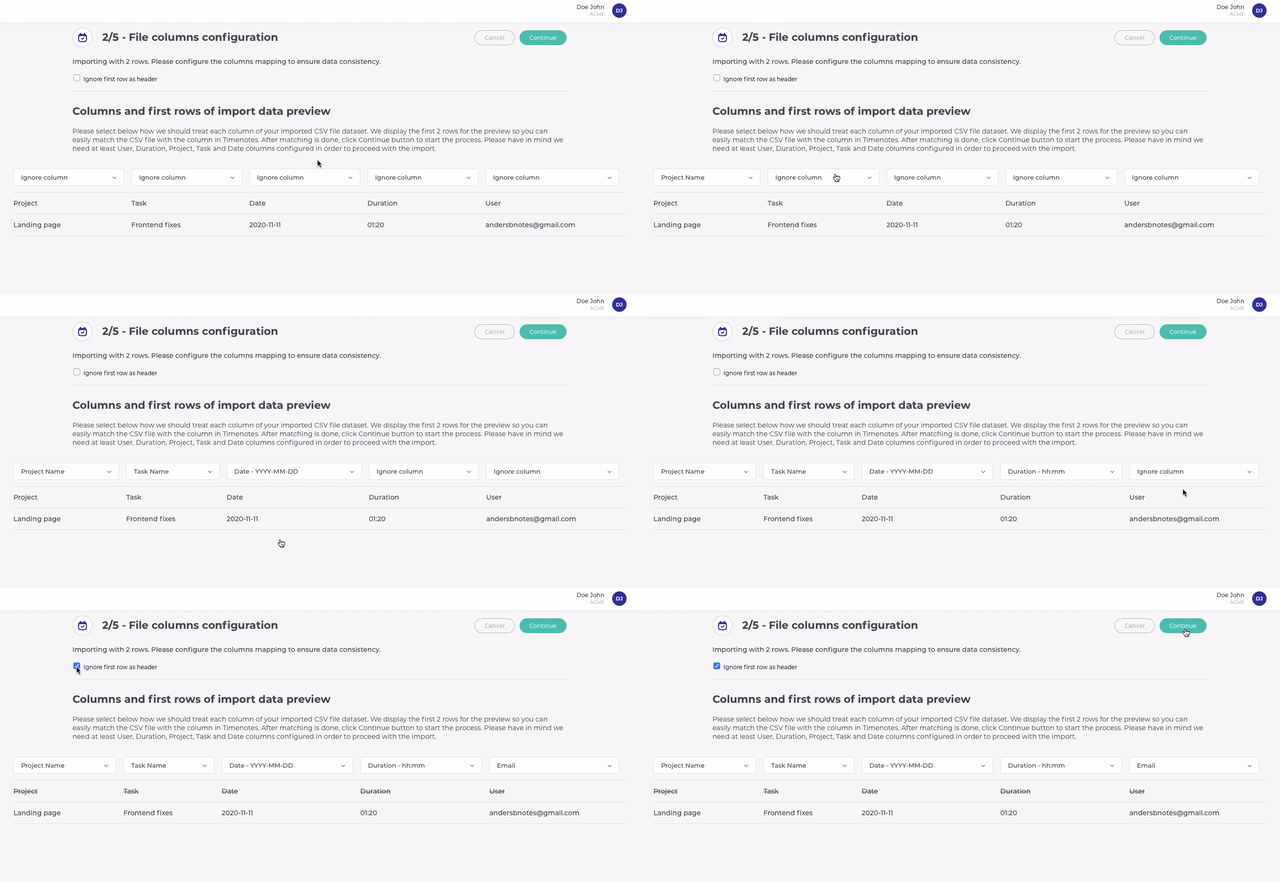
The imported file - Firstly, download the CSV sample file to get a grasp of what your file should look like. The first row should consist of the different data types you must import. These are: the date, duration, project, task and email of the team member. You can also add clients, tags, descriptions, billable amounts and cost amounts. The order can be arranged to your liking. Every next row is a specified time log. Do not use extra spaces next to comas.

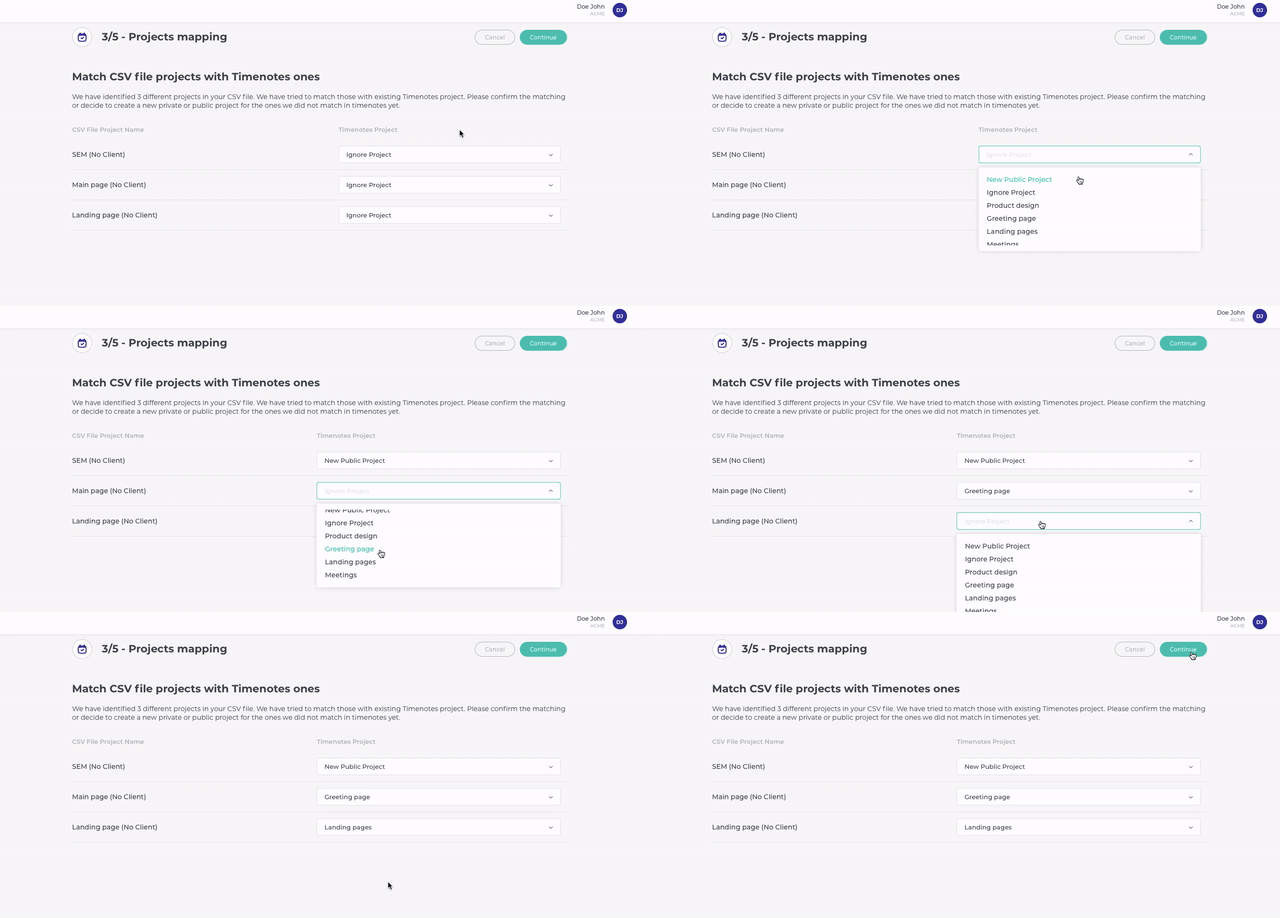
New and existing projects - Decide whether the imported time logs are part of new or already existing Timenotes projects.

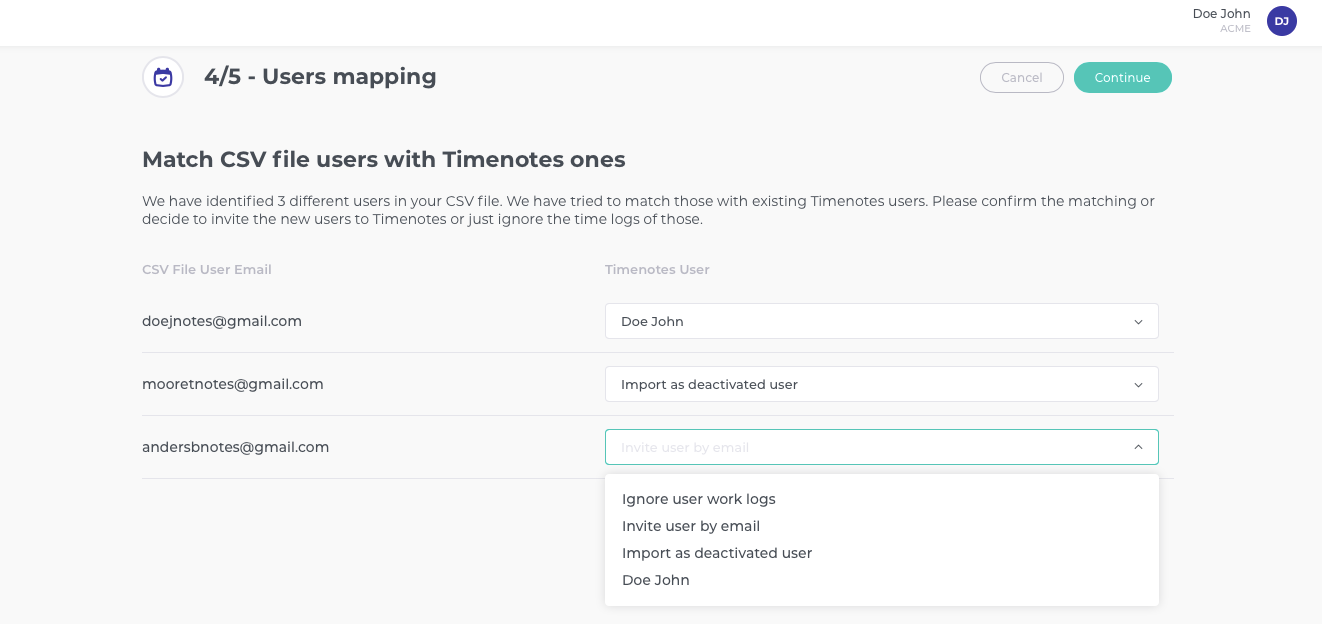
Import time logs with or without inviting users - If you wish to import time logs without inviting the member, select the "Import as deactivated user" option. Later, you will be able to reactivate and invite the user. To import time logs and simultaneously invite members, select "Invite user by email"

Importing projects, tasks or users
Importing other data types separately is done using the same process, only fewer data types are necessary. To import tasks you must include projects and task names in the CSV file. To import projects only project names are necessary and to import users you only need to include users' emails in your data file. Remember, that you can include additional information such as clients, tags or descriptions to these imports.
Related guides
Guides - How to configure if new projects are visible to everybody or not